Unstable Feature
Gameyfin's plugin API is currently in an unstable state.
Expect breaking changes until the release of 2.0.0 (probably even after that).
Plugin Development Tutorial
In this tutorial, we will walk through the process of creating a plugin for Gameyfin. We will cover the prerequisites, set up your development environment, and create a simple plugin.
Prerequisites
Before you start developing plugins for Gameyfin, ensure you have the following prerequisites:
- Basic knowledge of Java or Kotlin (recommended)
- Familiarity with Gradle build system
- An IDE such as IntelliJ IDEA (recommended) or VS Code
- Java Development Kit (JDK) 21 or higher installed on your machine
- Gameyfin installed and running (see Installation Guide)
The tutorial will be written in Kotlin, but you can also use Java if you prefer. We will use Gradle as the build system, which is the standard for Gameyfin plugins. As IDEs, we recommend using IntelliJ IDEA for Kotlin development, but you can also use VS Code with the Kotlin extension.
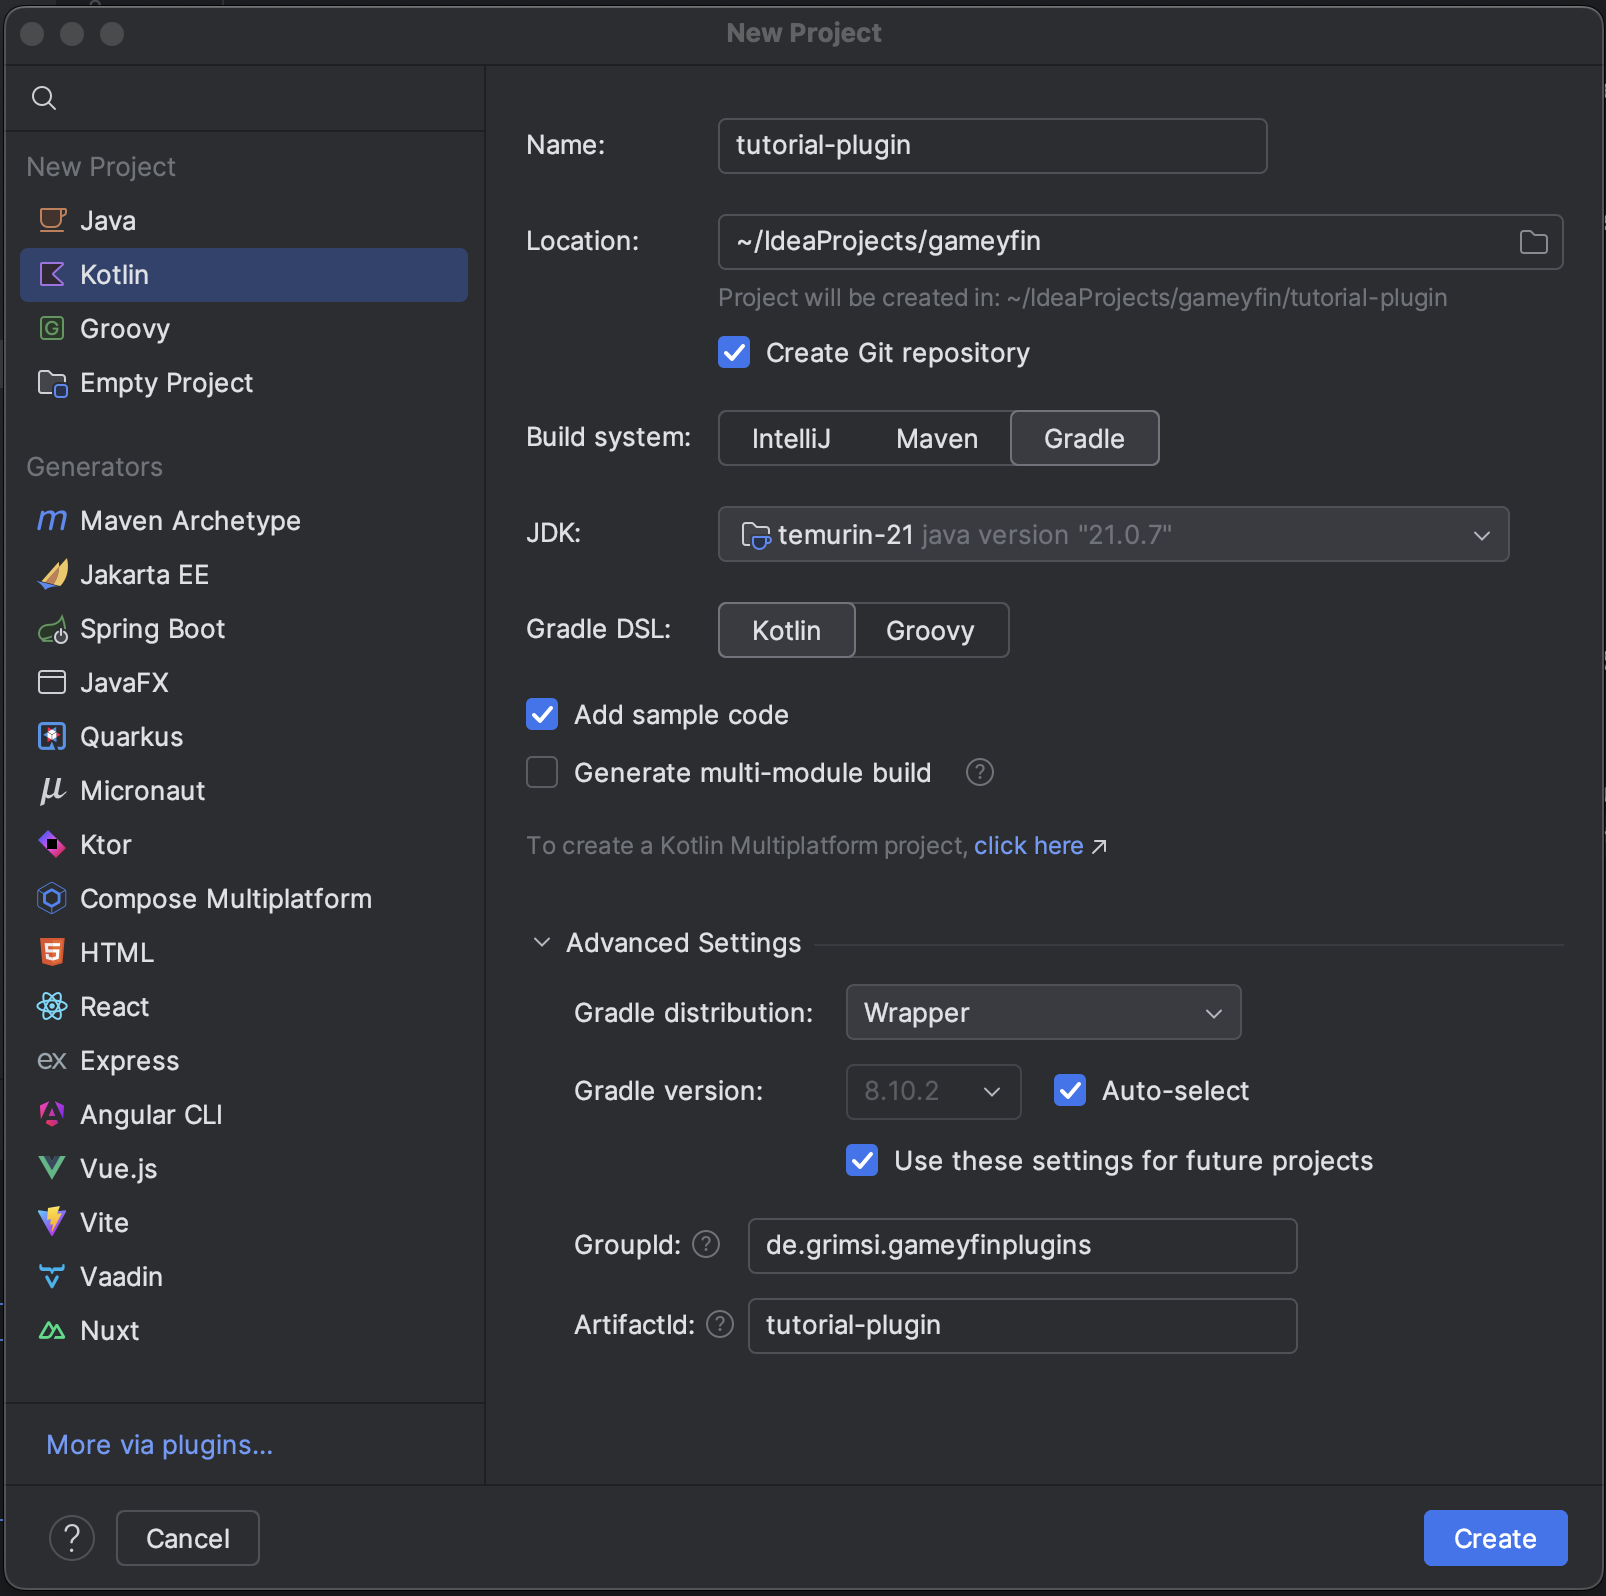
Setting Up Your Development Environment
Open your IDE and create a new Gradle project. You can use the following settings (change name, grouId and artifactId):
Build Script Configuration
Open the build.gradle.kts file and configure it for your plugin development. Here’s a basic setup:
-
Read version from plugin manifest file: Add the following code to read the version from the
MANIFEST.MFfile (this file will be created in a later step):// Read the version from the MANIFEST.MF file in resources val manifestFile = file("src/main/resources/MANIFEST.MF") val manifestVersion: String? = if (manifestFile.exists()) { Manifest(manifestFile.inputStream()).mainAttributes.getValue("Plugin-Version") } else null version = manifestVersion ?: "1.0-SNAPSHOT" -
Plugins: Add the following plugins:
KSP (Kotlin Symbol Processing) is used for annotation processing in Kotlin. -
Dependencies: Add the following dependencies (check for their latest versions):
- Build Script: Ensure your
build.gradle.ktsfile is set up to build a JAR file containing your plugin code and resources:tasks.jar { duplicatesStrategy = DuplicatesStrategy.EXCLUDE isZip64 = true archiveBaseName.set("plugin-${project.name}") manifest { from("./src/main/resources/MANIFEST.MF") } from(configurations.runtimeClasspath.get().map { project.zipTree(it) }) { exclude("META-INF/*.SF") exclude("META-INF/*.DSA") exclude("META-INF/*.RSA") } from(sourceSets["main"].output.classesDirs) from(sourceSets["main"].resources) // Include logo file under META-INF/resources from("src/main/resources") { include("logo.*") into("META-INF/resources") } } tasks.register<Copy>("copyDependencyClasses") { dependsOn(tasks.jar) duplicatesStrategy = DuplicatesStrategy.EXCLUDE from(configurations.runtimeClasspath.get().map { project.zipTree(it) }) { include("**/*.class") } into(layout.buildDirectory.get().asFile.resolve("classes/kotlin/main")) } tasks.build { dependsOn("copyDependencyClasses") }
Creating Your First Plugin
-
Manifest File: Create a
MANIFEST.MFfile insrc/main/resourceswith the following content (the content is explained here):Plugin-Version: 1.0.0 Plugin-Class: org.gameyfin.plugins.TutorialPlugin Plugin-Id: org.gameyfin.plugins.helloworld Plugin-Name: Gameyfin Example Plugin Plugin-Description: Demonstrates how to implement a simple game metadata plugin.<br> Always returns a hardcoded game with the name "Hello World" and the original ID "hello-world-game". Plugin-Short-Description: Example plugin for Gameyfin Plugin-Author: grimsi Plugin-License: MIT Plugin-Url: https://github.com/gameyfin/plugin-template -
Main class: Create a main class for your plugin in
src/main/kotlin/TutorialPlugin.ktwith the following content:This class extends// ... Package definition and imports enum class ExampleEnum { OPTION_ONE, OPTION_TWO, OPTION_THREE } class TutorialPlugin(wrapper: PluginWrapper) : ConfigurableGameyfinPlugin(wrapper) { /** * This is the configuration metadata for the plugin. * All configuration values set by the admin(s) are stored encrypted in the Gameyfin database. */ override val configMetadata: PluginConfigMetadata = listOf( ConfigMetadata( key = "exampleConfigProperty", type = String::class.java, label = "Example Configuration Key", description = "This is an example configuration key for a Gameyfin plugin.", ), ConfigMetadata( key = "secretExampleConfigProperty", type = String::class.java, label = "Secret Example Configuration Key", description = "This is a secret configuration key for a Gameyfin plugin. It will be displayed as a password field in the UI.", isSecret = true ), ConfigMetadata( key = "optionalExampleConfigProperty", type = String::class.java, label = "Optional Example Configuration Key", description = "This is an optional configuration key for a Gameyfin plugin. It is not required to be set.", isRequired = false ), ConfigMetadata( key = "exampleConfigPropertyWithDefault", type = String::class.java, label = "Example Configuration Key with Default Value", description = "This is an example configuration key with a default value.", default = "default" ), ConfigMetadata( key = "exampleEnumConfigProperty", type = ExampleEnum::class.java, label = "Example Enum Configuration Key", description = "This is an example configuration key with an enum value and a default value. This will be displayed as a dropdown in the UI.", default = ExampleEnum.OPTION_ONE ) ) }ConfigurableGameyfinPlugin, which allows you to define configuration metadata for your plugin. If your plugin does not require or offer configuration, you can extendGameyfinPlugininstead and omit theconfigMetadataproperty.
Gameyfin will automatically handle the configuration UI and database storage for you so you can focus on the plugin logic. -
Config validation: Let's take a look at how to validate the config values:
By default, Gameyfin will perform the following basic validation checks on the plugin configuration:
- Check if all required config values are present (either by using the admin provided value or the default as fallback).
- Check if the config values are of the correct type (e.g., String, Integer, Enum, etc.).
If the verification fails, Gameyfin will not start the plugin and will show error messages in the UI.
If you want to add custom validation logic, you can override the
validateConfigurationmethod in your plugin class:override fun validateConfig(config: Map<String, String?>): PluginConfigValidationResult { // Use the built-in validation first (optional) val validationResult = super.validateConfig(config) if (!validationResult.isValid()) { // Return early if the built-in validation failed (also optional) return validationResult } // Custom validation logic // Create a mutable map to hold validation errors (or use the one from the previous validation) val errors = mutableMapOf<String, String>() val exampleConfigValue = config["exampleConfigProperty"] if (exampleConfigValue != "helloworld") { errors["exampleConfigProperty"] = "Value must be 'helloworld'" } val exampleEnumConfigProperty = config["exampleEnumConfigProperty"] if(exampleEnumConfigProperty == null) { errors["exampleEnumConfigProperty"] = "This field is required" } else if(ExampleEnum.valueOf(exampleEnumConfigProperty) == ExampleEnum.OPTION_THREE) { errors["exampleEnumConfigProperty"] = "Option THREE is deprecated" } val secretExampleConfigValue = config["secretExampleConfigProperty"] if(secretExampleConfigValue == null) { errors["secretExampleConfigProperty"] = "This field is required" } else if (secretExampleConfigValue.length < 5) { errors["secretExampleConfigProperty"] = "Must be at least 5 characters long" } // If there are validation errors, return an invalid result with the errors // Otherwise, return a valid result return if(errors.isNotEmpty()) { PluginConfigValidationResult.INVALID(errors) } else { PluginConfigValidationResult.VALID } } -
Implement an extension: In this step we will add the functionality to fetch game metadata:
Plugins in Gameyfin consist of one Plugin wrapper class (TutorialPlugin in our case) and one or more extensions. Extensions are used to add functionality to Gameyfin, such as fetching game metadata while the wrapper class provides the plugin metadata to Gameyfin.
For our example, we will implement a simple extension that returns a hardcoded game with the name "Hello World" and the original ID "hello-world-game" (the only two required fields).
Create a new class
TutorialMetadataProviderwithin the plugin class. It should be annotated with@Extensionand implement theGameMetadataProviderinterface:@Extension class TutorialMetadataProvider : GameMetadataProvider { companion object { private val log = LoggerFactory.getLogger(this::class.java) } /** * Implement this method to provide game metadata from your plugin. * * The method receives a "gameId" which is usually the title of a video game. * The task of your plugin is to match this gameId to one or more video games and return metadata about it. * The metadata should be returned as a list of GameMetadata objects with the best match first and the worst match last. * If you could not find any matches, return an empty list. * * The required metadata fields are: * - title: The title of the game. * - originalId: The unique identifier of the game from your data source (e.g. "slug" from IGDB, "AppID" from Steam, ...). * * The remaining fields are optional, but you should try to fill them if possible: * - description: A short description of the game. * - coverUrl: A URL to the cover image of the game. * - screenshotUrls: A list of URLs to screenshots of the game. * - videoUrls: A list of URLs to videos of the game. * - releaseDate: The release date of the game. * - userRating: The user rating of the game (0-100). * - criticsRating: The critics rating of the game (0-100). * - developedBy: The developer(s) of the game. * - publishedBy: The publisher(s) of the game. * - genres: A list of genres the game belongs to. * - themes: A list of themes the game belongs to. * - keywords: A list of keywords associated with the game. * - features: A list of features the game has. * - perspectives: A list of perspectives the game can be played from. * * @param gameId This is the name of a file or folder that Gameyfin found in a game library. * @param maxResults The maximum number of results to return. You can return fewer results if you want. */ override fun fetchByTitle(gameTitle: String, maxResults: Int): List<GameMetadata> { // Log the gameId and maxResults for debugging purposes. log.debug("HelloWorldMetadataProvider: Fetching metadata for gameTitle: {} with maxResults: {}", gameTitle, maxResults) // For demonstration purposes, we will return a hardcoded example result. val exampleResult = GameMetadata( title = "Hello World Game", originalId = "hello-world-game" ) // Return a list containing the example result. return listOf(exampleResult) } /** * Implement this method to provide game metadata by its unique identifier. * * The method receives an "id" which is usually the unique identifier of a video game from your data source. * The task of your plugin is to match this id to a video game and return metadata about it. * If you could not find any matches, return null. * * @param id The unique identifier of the game in the source your plugin implements. * @return A GameMetadata object containing the metadata of the game, or null if no match was found. */ override fun fetchById(id: String): GameMetadata? { return GameMetadata( title = "Hello World Game", originalId = id ) } } -
Build the Plugin: Run the Gradle build task to compile your plugin and create a JAR file. You can do this from the command line:
This will generate a JAR file in thebuild/libsdirectory. -
Install the Plugin: Copy the generated JAR file to the
Restart Gameyfin to load the plugin. You should see your plugin in the Gameyfin Administration UI under the "Plugins" section.pluginsdirectory of your Gameyfin installation (create the directory if it does not exist). The path should look (kind of) like this: -
Test the Plugin: Profit
- Go to the Gameyfin Administration UI and navigate to the "Plugins" section.
- You should see your plugin listed there. Click on it to view its details.
- If you have configured any settings, you can modify them here.
- Test the plugin by disabling all other metadata providers, adding a game to your library and triggering a library scan.
You should see the "Hello World Game" in your library with the original ID "hello-world-game".